
Why a two-point hanging system?
A wire over one nail puts tremendous tension on the wire and its anchor points. Two hooks and a longer wire cut that force dramatically, keep the frame level, and stop it wobbling.


Forces on each anchor for a 10 lb frame
The problem with one nail
Up to 14 times the weight of the frame.
Traditionally, frames hang on a wire over a single nail or hook. That puts tremendous tension on the wire and its anchor points, and can break the wire, pull out fasteners, split the frame, or bow its sides and top, damaging both frame and art. If the wire is tight across the back, the force on each anchor point can be as much as 14 times the weight of the frame.
With a single hook, the wire rarely rises more than 15 to 20 degrees from horizontal, so the force on each anchor is more than twice the frame’s weight. With two hooks and the wire rising at a diagonal or near-vertical angle, it drops to slightly more than half the frame’s weight at each anchor, and near-vertical forces minimize sideways pressure on the frame and the art and glazing package.

Exaggerated to show the effect
What it does to a frame
The top bows upward.
For any 10 lb frame with the wire 15 degrees up from horizontal, each anchor point is pulled with 19 lbs of force. The force rises as the angle falls. Besides stripped screw eyes, split moulding and broken wire, a wire too near horizontal pulls the sides inward until they meet the art and glazing package, and the top of the frame bows upward. Since the package usually rests on the bottom rail, that can expose the top edge of the glass.
That’s why I attach the wire at a length that, hung from two hooks, rises between 45 and 60 degrees from horizontal. It significantly reduces those forces and keeps the frame level. Cleat systems and other two-point systems exist too, but a longer wire on two hooks is easy to install and level, keeps the frame from wobbling, and holds it flush to the wall.
Where do you hammer in the hooks?
Five steps to a level wall.
Every frame leaves the shop with two hangers, nails and an instruction sheet with its recommended hook spacing.
- 01
First, find the distance between the hooks
With the frame face down and upside down, pull the wire with two index fingers until it angles down from the anchors at least 45 degrees with a straight segment between them, then measure that segment. Each frame comes with a small instruction sheet giving the recommended distance.
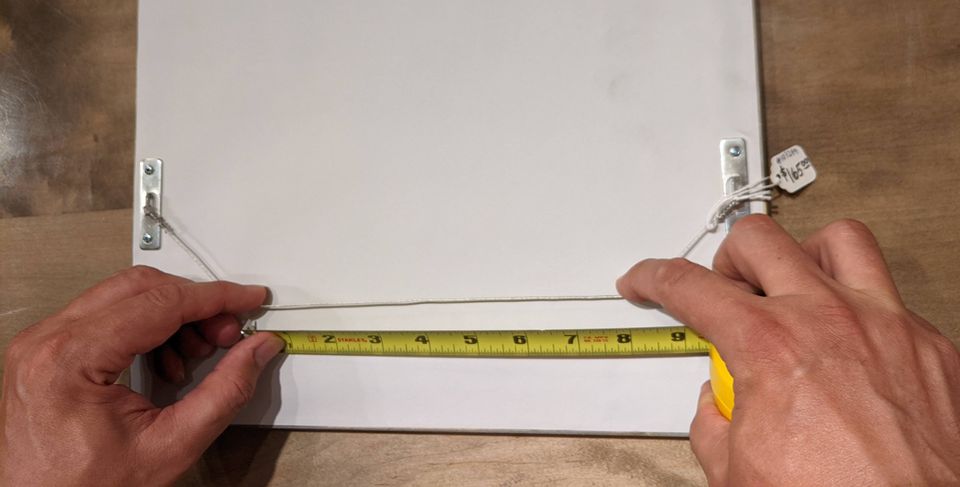
- 02
Measure from the wire to the frame’s top
Hold the wire in place against the back with your left index finger, release the right side, and measure from where your finger holds the wire to the top of the frame. That’s how far below the frame’s top the hooks go.
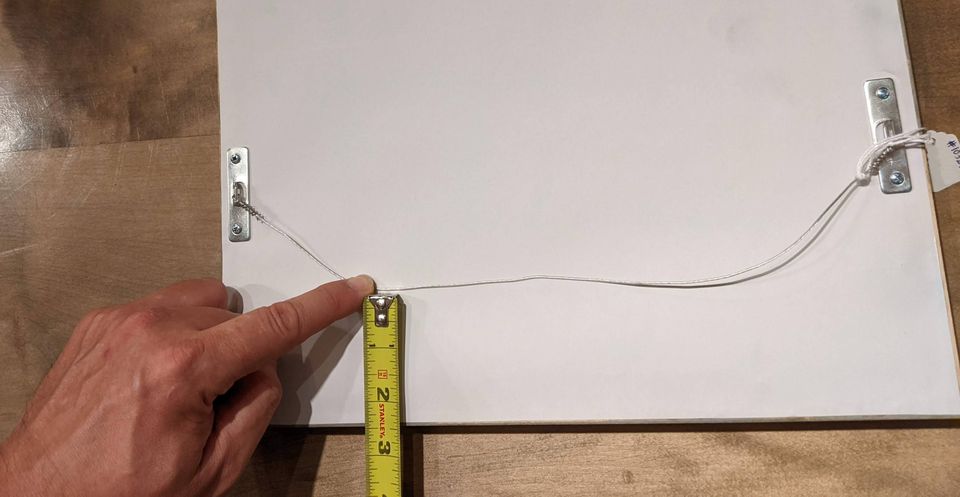
- 03
Establish the frame’s placement on the wall
Hold the frame where you want it and make a tiny, erasable pencil dash at the top center. For a grouping, cut brown paper to each frame’s size to fine-tune the layout first.
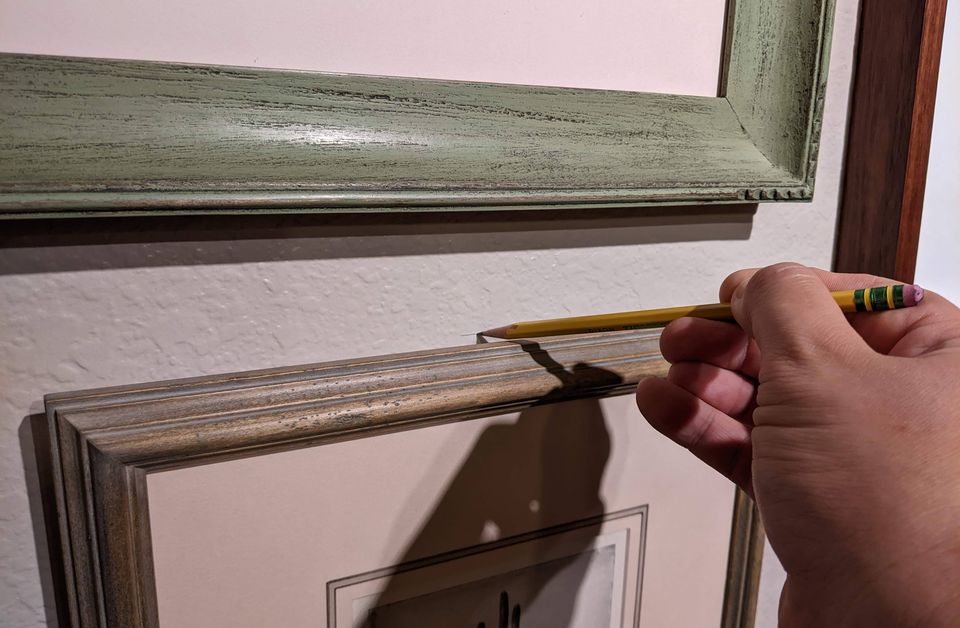
- 04
Measure down and across for the hooks
Measure down from the dash by your second measurement and make a plus sign. Then measure half the hook distance to either side and mark where the bottoms of the hooks should sit.
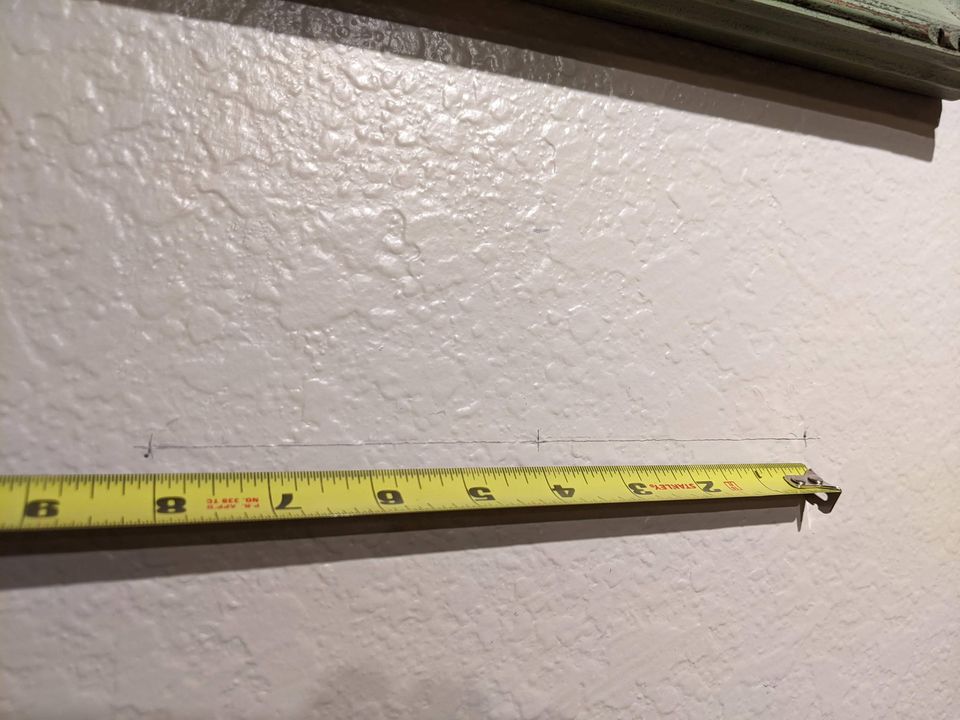
- 05
Hang the wire on both hooks and level
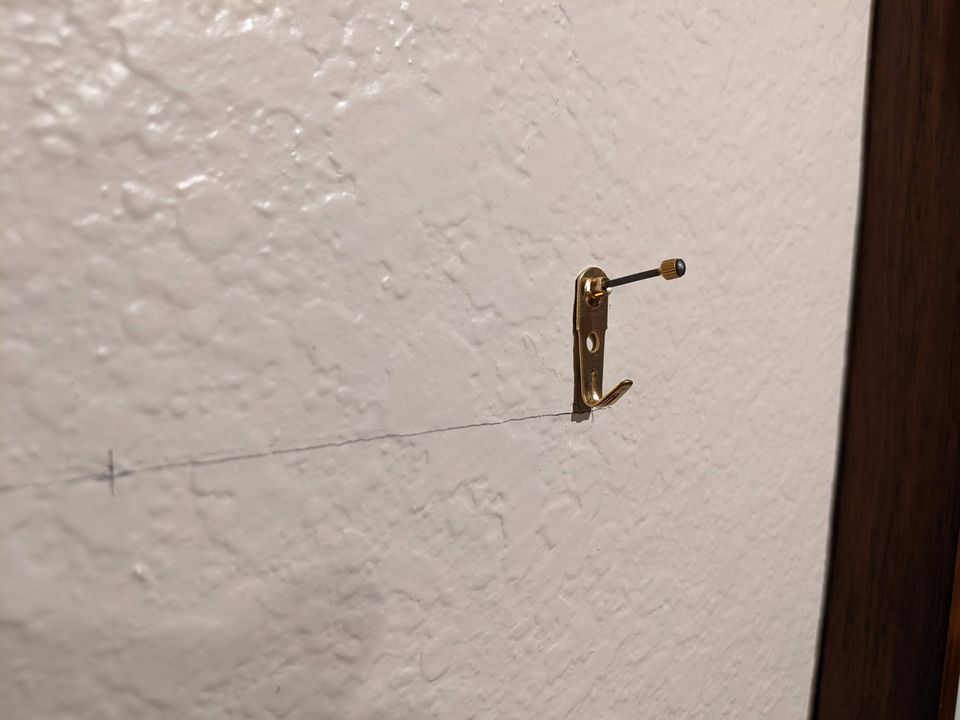
The imported Ziabicki Floreat hangers I include cradle a thin, sharp tempered-steel nail at the right angle, and suit lath-and-plaster walls. Heavy frames may need two or three nails. Slide the wire across the hooks until the frame is level; with the rubber bumpers on the bottom corners, it will stay that way.


Keep exploring

Book a consultation
Let’s design something together.
Bring your picture to the Oro Valley showroom, or invite me to your home anywhere in Pima County. Every consultation is by appointment, seven days a week.